 |
| Photo a la Tuan Tran |
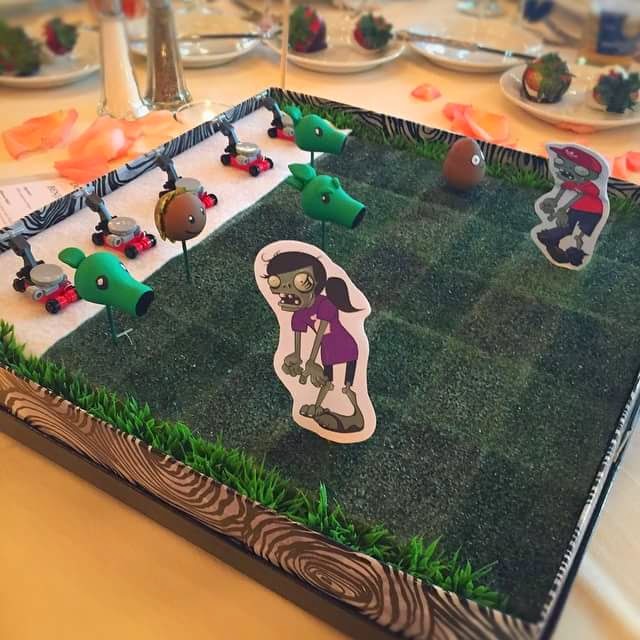
During another romp through Hobby Lobby, I got the idea to make a Plants vs Zombies centerpiece. Ben and I played the first one and second one together and we really love the game.
The lawnmowers
You probably want to buy/make these lawnmowers first so that you can be sure to get a base that fits.
For the lawnmowers, you have some options...
- I googled around and there was a couple of websites that actually sell miniature lawnmower toys. They're expensive but more realistic looking.
- Custom ordering LEGO pieces to make your own tiny lawnmower
- When I googled "lego lawnmower", some ebay users were selling some pre-made ones for about $4 each (not including shipping).
I chose to go with custom order LEGOs (I didn't search for lego lawnmower when I was looking into this so I never saw the ebay option...). I watched this youtube video online on How to Make a Mini Lawnmower. I thought they looked cute but unfortunately, they require getting custom pieces online (I tried walking into a LEGO store but they don't carry this variety in there). The video doesn't tell you what each piece is so I had to purchase these based on the images on the website. You may want to do some research to see if it's cheaper to buy some on ebay/lego website or just try to find everything on ebay.
| Image: | Quantity: | Color: | Name: | Find it: | Purpose: |
 | 1 | Red | Plate 2x2 | Lego website Search Plates | The base |
 | 1 | Black | Plate 1x2 W.Stick | Lego website Search Plates, Special | Attaches to handle bar |
 | 1 | Grey | Lamp Holder | Lego website Search Plates, Special | Looks like engine exhaust |
 | 4 | Red | Lamp Holder | ebay | Holds the "wheels" |
 | 1 | Grey | Round Plate 1x1 | Lego website Search Plates, Special | Covers the last bump on the base to support the engine top |
 | 4 | Black | Round Plate 1x1 | Lego website Search Plates, Special | Black "wheels" |
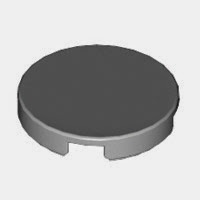 | 1 | Grey | Flat tile Round 2x2 | ebay | Engine top. Make sure you get the 2x2! |
 | 1 | Grey | Bad Robot Arm | ebay | Handle bar |
 | 1 | Grey | T Piece | Lego website Search Technic | Handle |
Your final piece will look something like this!

I wanted to make sure these lawnmowers stay in place so I grabbed some paperclips, unwrapped it and stuck one over one of the wheels into the foam.
.jpg)
It's not really necessary but it'll be helpful to not lose your lawnmowers and to keep them in place.

The base

The next step is to find a container that will fit your needs. I wanted something relatively square that wasn't going to be too expensive. While at Michaels, I spotted this paper container for ($5.99). It's a good size, not too expensive and the right shape. I also grabbed this green foam in the flower section ($12.99). Since it's mostly grass in the game, this will make coloring it easier.
Normally on a 40% off one item, I would have gotten about $5 off this foam but this week was a 20% your bill coupon, so I only saved 3.80 off the two items. I could have waited until next week for the 40% coupon but I'm too impatient.
Tip: foam is not really meant for painting. It flakes a lot and creates this hard, glittery dust. Make sure you do this over a hard table that's easy to clean up. A wet paper towel will pick those up easily.

The first thing I did was carve the foam to fit inside the box. After I cut it to size, I measured it. Since you might buy a different container, your piece might be a different size so you'll have to measure it properly. My foam piece came out to be around 30cm. Since Plants Vs Zombies has 5 rows, each row will be around 6cm for me. I marked every 6cm with a sewing pin on opposite sides and then tied a piece of string so that I could have a line. I repeated this for all 5 rows.
Looking at the Plants vs Zombie picture, it looks like they're not really squares but rectangles. I measured the other size and it came out to around 32 cm. I decided to do 8 columns at 4cm each. Using the same method, I marked each with a pin on each side and then tied a piece of string. In the end, I get a nice outline of what I want to color.

So I just start painting (and by painting, I mean just dabbing it with paint)! I started by painting every other row. Then I start filling in the rectangles with random shades of green. You want each rectangle to be different from the one next to it so that you can see the difference. This is what it looks like after I removed the string. I may redo the pins and put in some sort of green string so that the grid is more prominent. For now, I feel like I can see it but the room will probably be dark and people won't be able to see it well in the reception room.

For the plants, I'm using some oven bake clay. Shop around for the cheapest clay. I found small colored ones for about $1.50 each at Michael's while they were about $2.50 at Hobby Lobby. Luckily I went back to Michaels with the 20% off coupon and bought 5 (essentially getting one for free).
For the sunflower, I rolled a ball and then cut out "petals". You want small sharp scissors. Make a small, angled cut into the clay and then gently pull the clay up a little so that the petal comes out. Repeat all the way around for a flower look. Make sure to include the leaves and eyebrows before baking.


 The tricky part is baking them. If you lay these on the side, you will get a flat bump on one end. If you're fine with that, then ignore this step. I ended up using an old disposable pie platter, turning it upside down and puncturing holes in them to prop them up. Since it's a flimsy foil, the heavy heads sometimes leans over to one side. If you're afraid of them touching each other, just leave more space in-between each hole so that they won't touch each other even if they lean.
The first thing I did was carve the foam to fit inside the box. After I cut it to size, I measured it. Since you might buy a different container, your piece might be a different size so you'll have to measure it properly. My foam piece came out to be around 30cm. Since Plants Vs Zombies has 5 rows, each row will be around 6cm for me. I marked every 6cm with a sewing pin on opposite sides and then tied a piece of string so that I could have a line. I repeated this for all 5 rows.
Looking at the Plants vs Zombie picture, it looks like they're not really squares but rectangles. I measured the other size and it came out to around 32 cm. I decided to do 8 columns at 4cm each. Using the same method, I marked each with a pin on each side and then tied a piece of string. In the end, I get a nice outline of what I want to color.
So I just start painting (and by painting, I mean just dabbing it with paint)! I started by painting every other row. Then I start filling in the rectangles with random shades of green. You want each rectangle to be different from the one next to it so that you can see the difference. This is what it looks like after I removed the string. I may redo the pins and put in some sort of green string so that the grid is more prominent. For now, I feel like I can see it but the room will probably be dark and people won't be able to see it well in the reception room.
 |
| The foam wasn't wide enough so I filled it with some leftover grass |
I left two columns blank because that will be the concrete where the lawn mowers are. Painting isn't easy because foam doesn't absorb well (that's why I started with the green foam) so I bought a really cheap piece of white felt (around 50 cents) and placed it on top. The nice thing about felt is that it sticks to this flower foam, kind of like velcro.
The plants
For the plants, I'm using some oven bake clay. Shop around for the cheapest clay. I found small colored ones for about $1.50 each at Michael's while they were about $2.50 at Hobby Lobby. Luckily I went back to Michaels with the 20% off coupon and bought 5 (essentially getting one for free).
For the sunflower, I rolled a ball and then cut out "petals". You want small sharp scissors. Make a small, angled cut into the clay and then gently pull the clay up a little so that the petal comes out. Repeat all the way around for a flower look. Make sure to include the leaves and eyebrows before baking.
Toothpicks: As you can see, I used toothpicks to prop them up and will also serve as the plant stem. Note: I tried to use a green sharpie to color these toothpicks later but couldn't reach the base where the head was. You should either color these toothpicks first (before you stick it in the head) or get the already colored toothpicks.
The zombies
If you're creative, feel free to create some zombies. I used the Plants vs Zombies image and customized it to look like us. I reflected the image and taped them back to back (on a toothpick) so that you can see the zombies from either side.


 To complete Ben's snail, I bought a doll-sized cowboy hat and cut it into a baseball cap. Unfortunately it came in a set of 4 but I figured I can either use them for other centerpieces or I will get 4 attempts at a passable hat.
 I attempted to paint the Adidas logo on it since that is Ben's signature look. The first attempt (right) was with a regular white out stick. The slightly furry surface soaked up the paint more than I wanted to and I had very little control.


